

helmet logo printing machine for sale

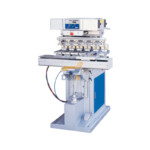
Product:helmet logo pad printing machine
Model:DX-M6S
Printing color:6 color
Brand:DSTAR
Max printing plate size:100*200mm
Max printing size:80*180mm
Forward/backward stroke:225mm
Silicone pad vertical stroke:75mm
Printing plate central space:127mm
N.W:280KGS
Dimension:L100*W96*H150cm


About pad printing
Pad printing is also called tampography or tampo printing, is an indirect offset (gravure) printing process where a silicon pad takes a 2-D image from a laser engraved (etched) printing plate (also called cliché) and transfers it to a 3-D object. Thanks to pad printing, it is now possible to print all kind of difficult shaped products such as curved (convex), hollow (concave), cylindrical, spherical, compound angles, textures, etc. which were not available with traditional printing processes.Such as helmet logo printing.
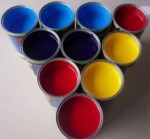
To be able to pad print you need some essential parts:
Helmet Logo Printing Machine samples


HOW TO PAD PRINT?
Step 1: The closed (sealed) ink cup sits over the engraved (etched) artwork area of the pad printing plate, covering the image and filling it with ink. This is called the home position.
Step 2: The closed ink cup moves away from the engraved artwork area, taking all excess ink and exposing the engraved image, which is filled with ink. The top layer of ink becomes tacky as soon as it is exposed to the air; that is how the ink adheres to the transfer pad and later to the product to be printed.
Step 3: The transfer pad presses down onto the printing plate momentarily. As the pad is compressed, it pushes air outward and causes the ink to lift (transfer) from the engraved artwork area onto the pad.
Step 4: As the transfer pad lifts away, the tacky ink film inside the engraved artwork area is picked up on the pad. A small amount of ink remains in the pad printing plate.
Step 5: As the transfer pad moves forward, the ink cup also moves to cover the engraved artwork area on the printing plate. The ink cup again fills the engraved artwork image on the plate with ink in preparation for the next cycle.
Step 6: The transfer pad compresses down onto the product, transferring the ink layer picked up from the printing plate to the product surface. Then, it lifts off the substrate and returns to the home position, thus completing one print cycle.
How can i get a correct machine recommendation?
Please provide some necessary information to DSTAR sales.We will be glad to recommend best economic machine proposal.
- What product you want to print?
- How much printing size it is
- Sample picture
- Product material


WeChat
Scan the QR Code with wechat